
Watch this video introduction to aluminum milling basics. Tech expert Kurt Repsher walks you through how to choose the right end mill and lubricant for your aluminum milling application, the pros and cons of various tool materials, helix angles, coatings, and much more! Subscribe to our YouTube Channel and be the first to see more awesome how-to videos like this one!
ALUMINUM BASICS:
Aluminum is one of the most machinable, and affordable metals available, which is what makes it so common in pretty much any machine shop. The following aluminum milling basics will help you to hit the ground running, so you can land some good jobs and handle them like a pro.
SOME OF THE CHALLENGES:
If you’re making a part or two, it won’t really matter how hard you push the tool for maximum material removal. But if you’re making 10,000 pieces a week, you’ll need a more effective strategy.
- The main challenge with machining aluminum efficiently is simply achieving the maximum material removal rates without breaking a tool or causing downtime.
- If it gets too hot, aluminum can melt and fuse itself to the tool, which will stop it in its tracks, potentially destroying both the tool and the workpiece.
- The difference between cast and wrought aluminum is that cast is always gummier, so keep your tools razor sharp and cut with caution. The main challenge with milling aluminum is keeping friction and heat to a minimum.
DIFFERENT GRADES OF ALUMINUM: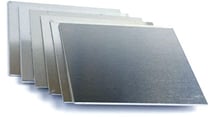
- To start with, all types of aluminum are very machinable. The more you push the tool, the more you’ll notice the differences between them.
- Grade 6061 is the most common aluminum, but check out our adjacent chart for other grades and some of their notable characteristics.
- As machinable as aluminum is, you still need to be careful during fast, heavy rough-cuts, when the tool exits the material. There’s some risk of tool chipping.
| Grade 2011 | This is essentially the most machinable of all aluminum grades. The resistance to corrosion is among the worst, so anodizing is usually a necessity. |
| Grade 2024 | This grade has an excellent strength to weight ratio. Although it machines very well, it may chip at the end of fast, heavy cuts when the tool leaves the workpiece. The corrosion resistance of 2024 is pretty poor, so be careful about leaving it for any length of time in coolant or a parts tumbler. |
| Grade 5052 | Because this is so soft, it’s usually used for forming applications. Its excellent corrosion resistance allows it to be used in marine applications. It’s one of the gummier grades, so it can tend to heat up quickly and clog a cutter. Make sure your cutters are razor sharp and you have great lubrication, or your surface finish will be galled, and you’ll risk blowing up your tool and scrapping a workpiece. |
| Grade 6061 | This grade is probably more common than all the others combined, and it’s a breeze to cut. You should still use care while exiting the material on very heavy, fast cuts. It’s better than 2024, but there’s still some risk of chipping. |
| Grade 6063 | Similar to 6061, but more commonly supplied in extrusions, but a little more gummy, which makes it a bit harder to machine than 6061. |
| Grade 7075 | This is popular in structural components like bicycle frames and aircraft wing supports. It’s a very stiff material, which makes it easy to machine, but not as nicely as 6061. The best surface finish this grade is capable of is something like a smooth, but dull grey color. |
CUTTING TOOLS FOR ALUMINUM:
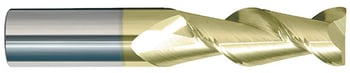
Try to avoid using a general-purpose cutters for aluminum. Technically they’ll work, but aluminum is very different from steel. Here are a few tips on tool selection:
Cutting Tool Material:
- Choice #1: Solid Carbide.
- Solid carbide end mills are the best value when you compare tool life verses its cost.
- They can be run at a much faster feed and speed; the surface finish is better, and they stay sharper longer.
Flutes:
- The key is to have a huge amount of clearance, to avoid chip congestion.
- 3 flutes is the best choice most of the time. It’s the ideal balance of tool strength, chip clearance and reduced chatter, especially for larger end mills.
- 2 flutes can be better for ramping and plunging operations.
- Since most 3 flute end mills only have one edge that is center cutting, both cut to the center on a 2 flute end mill, making them the better choice when using the bottom of the end mill.
Helix Angle:
- A lesser helix angle will run cooler—since it’s spending less time in the aluminum.
- A higher helix is smoother cutting, gives a great surface finish.
- For roughing, a lower helix angle of about 35° works great. The tool stays cooler, and nobody cares about surface finish when roughing anyway.
- A higher helix angle of 45° is an excellent choice for finishing. Light finishing cuts don’t generate much heat and it leaves a beautiful and more accurate surface finish.
- For both roughing and finishing, use a 40° helix angle is a good compromise.
Tool Finish/Coating:
- In general, uncoated, polished end mills and inserts are the best way to go. There isn’t much advantage to coatings on a solid carbide tool that’s cutting aluminum. And some will do more harm than good.
- AlTiN or TiAlN = bad idea! This coating a for steel, not aluminum. The surface of a tool with this coating isn’t particularly smooth, and there’s aluminum in it! The material you’re cutting will tend to weld itself to the coating, giving you a horrible surface finish and likely blowing up your tool.
- TiN isn’t bad, but it’s not much better than a polished finish.
- ZrN has a super low coefficient of friction, so it can help with chip flow and keep everything running cool.
Corner Radius:
- Solid carbide is extremely hard, which makes it brittle.
- End mills for cutting aluminum are razor sharp and often have a radical helix angle.
- This combination makes it very easy to chip the corner of the cutting edge.
- If you can, use an end mill with a corner radius to reduce the risk of corner chipping.
FEEDS AND SPEEDS:
- For production, you can push the tool to at least 1% of its diameter per tooth.
- A 2 flute, 1/2″ end mill should be fed at least .005″ per tooth, or .010” per revolution.
- With a rigid setup and stubby tool, you might even be able to double that.
- The only exception to this is when you’re working with small tools, like 1/8″ or less. Chip clearance can become an issue, which means that you’ll need to slow down for thinner chips.
CUTTING FLUID:
- Never cut aluminum dry. Almost any cutting oil will do, but better if it’s for aluminum.
COMMON OPERATIONS:
Facing:
- If you’re going to use a face mill, definitely go with an aggressive rake angle and polished inserts. Your surface finish will be amazing, and you’ll be able to really push the RPM.
Slotting:
- Select an end mill that has the same, or only slightly longer flute length and the slot’s depth of cut.
- A stub length tool is significantly stronger, which reduces tool deflection.
- For deep slotting, use an end mill with a short flute length and a reduced neck diameter.
Pocketing:
- Your step over can be close to the full diameter of the tool.
- As with any material, use a tool diameter that’s slightly smaller than an inside radius.
- This will leave a smoother surface finish in the corners and the machine is also able to run at higher speeds while rounding those corners.
- Use the same flute length rule as we did for slotting.
ORDER OF PRIORITIES:
#1) Cutting Parameters:
- Stepover / stepdown, feed rate & RPM
#2) Cutter geometry:
- Something specifically for aluminum and operation (roughing, finishing, etc.).
- Helix angle, carbide grade, number of flutes, etc.
#3) Cutter coatings/finish:
- ZrN or polished
#4) Type of coolant or cutting oil:
- Definitely use it, but don’t be too concerned about what type it is.
Ultimately, if you really want to excel with aluminum, you’ll need to do some experimenting. Contact our tech support team for process improvement advice and aluminum milling product recommendations, which include USA-made Rushmore end mills on page 65 and page 70 of our current catalog.
WAnt to learn more about aluminum machining?
We believe the right tool is everything! Download our Aluminum Machining Guide and ensure you have the information you need to select the right tool for your aluminum machining applications, every time!
By downloading the Aluminum Machining Guide you'll also find information on:
- Milling approach angles
- Insert substrates, coatings & post treatment
- Insert shape and geometries
- Troubleshooting insert failure
- Pros & cons of solid carbide vs. indexable tooling
- How to choose the right tool for your aluminum milling application