
What Causes Thread Damage?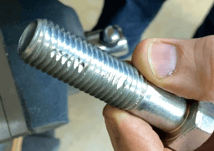
Thread damage is a common and frustrating challenge that can occur as the result of a variety of factors. Typically, thread damage is caused when a tap or fastener breaks in a hole, when a fastener is installed incorrectly, when incorrect bolt torque is used, or when thread fretting occurs as a result of extended or extreme vibration during machining applications.
How can you repair threads?
Just as a thread can be damaged via a multitude of causes, there are a variety of ways a thread can be repaired. If a male thread (a screw or a bolt for instance) is damaged, it can often be fixed by ascertaining the thread pitch by utilizing a screw pitch gage, and then running the appropriate thread file over it. (Watch a video of this method of thread repair here). If a thread's damage is minimal, it may even be possible to reform the threads by running a nut up and down, though that runs the risk of the nut fusing to the thread (galling).
Similarly, when threads are stripped out of a hole, there are a number of approaches one can take to repair them. Drilling out the hole and tapping it with a larger diameter thread is one option, provided there is room for a larger fastener. When creating a new, larger tapped hole isn't optimal or possible, use of a thread repair kit is recommended.
thread repair kits
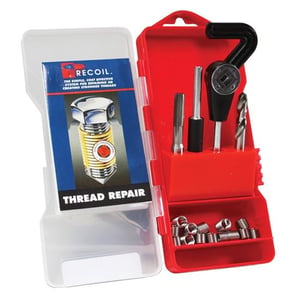
Thread repair kits allow you to remove the damaged threads that are stuck in a hole and replace them with new threads of the same diameter. They may also be used to create strong threads in soft materials including aluminum. Thread repair kits consist of a tapping tool, an insertion tool, and thread inserts. A tap wrench and drill will also be necessary when using a thread repair kit. The drill bit is not always included in the kit.
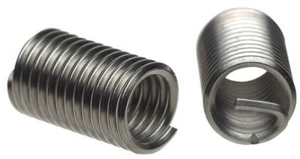
The most popular type of thread insert used in a thread repair kit is a helical insert. A helical insert looks like a very tightly wound & compact spring. It consists of helically coiled stainless steel wire with a diamond-shaped cross section. This cross-section allows the external portion of the wire to screw into the hole's receiving threads during installation, while the spacing between the coils of the insert's inner portion of the wire form new conventional 60° threads within the hole. The tension between the insert and the walls of the hole helps to keep the insert in place and keep it from unthreading. The helix has a small return at one end that engages with the kit's included insertion tool, allowing the insert to be screwed into the hole. A small notch in the wire allows this return to be broken off once the insert has been installed.
Using a helical insert to repair threads, step by step:
 Drill out the damaged threads using a drill bit of the correct diameter.
- Tap the hole with a special thread to accept the threaded insert. The tap required will be included in the thread repair kit.
- Use the insertion tool to screw the threaded insert into the hole, stopping the threaded insert just below the part's surface.
- Unscrew the insertion tool to release torque, allowing the threaded insert to expand slightly and lock into the part.
- Break off the tang where the thread insert wire returns across the hole (A hex tool can be inserted through the new thread to rest against the tang and it typically will snap off easily with the light tap of a hammer).
Tech Team Tip:
Often, soft materials like aluminum allow threads to pull from their base material when under pressure or strain. An installed helical threaded insert can provide a more secure threaded connecting point and overall stronger threads.
WAnt to learn more?
We believe the Right Tool Is Everything™, and we strive to share our experience and expertise in an effort to ensure you select the right tool for your application and follow best practices. Download our comprehensive Tapping Right Guide on different tap styles and learn how to best apply them, allowing you to approach your tapping applications more efficiently than ever!
You'll find information on: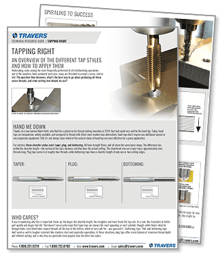
- The right tap for your application
- The differences & benefits of each tap style
- Chip control
- And more!